How to Switch to a Shampoo Bar Without the Mess

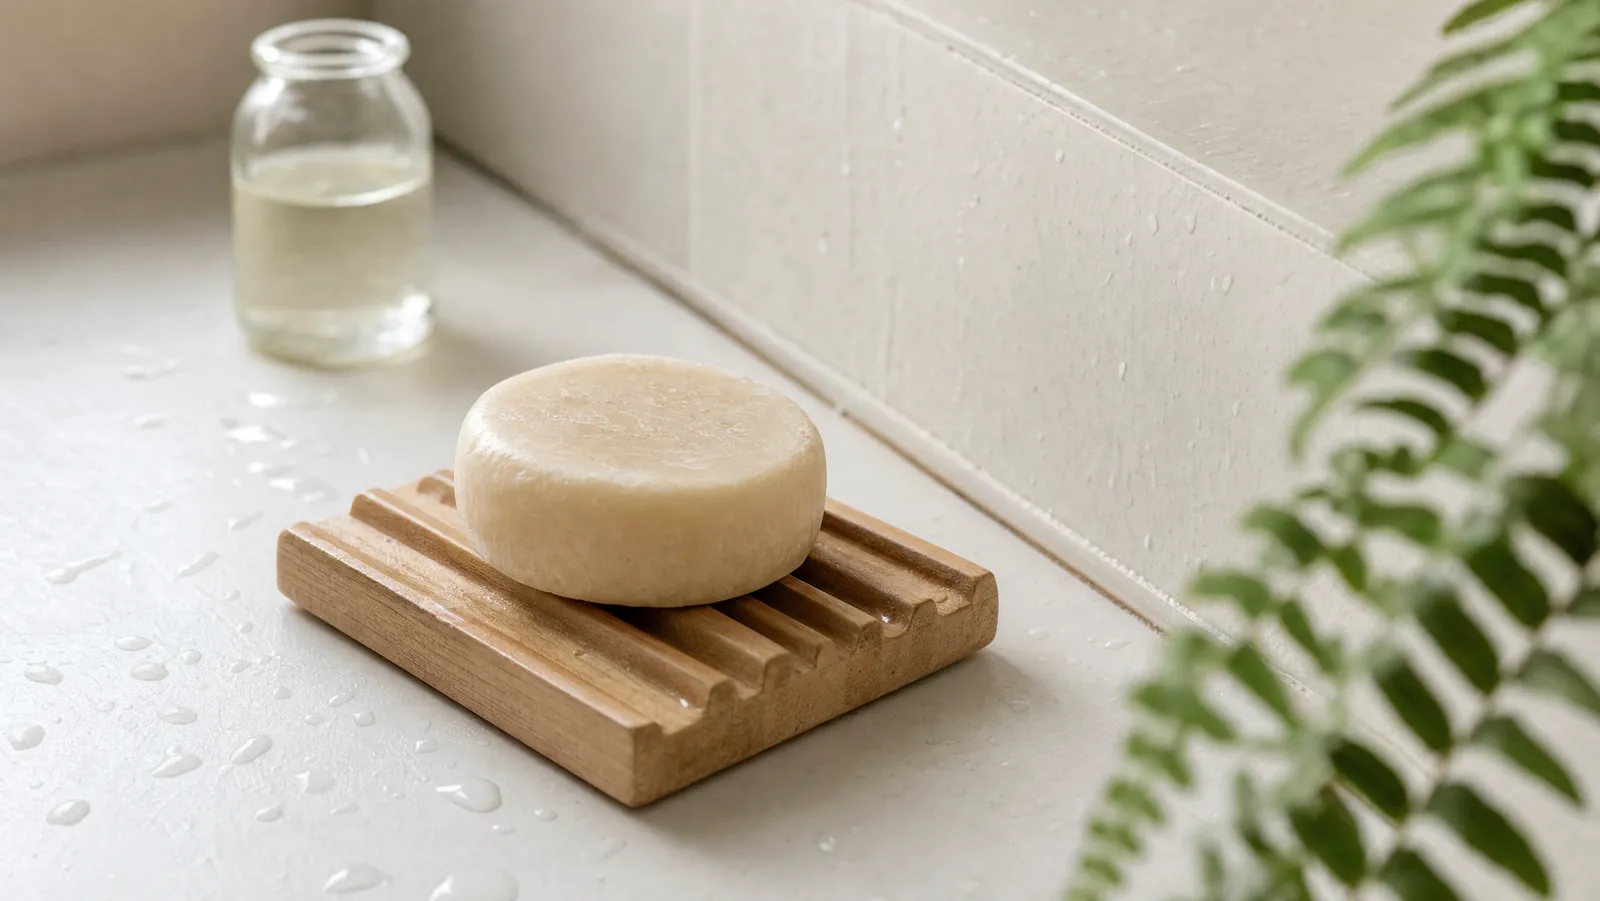
Wet your hair, wet the bar, rub the bar directly on your scalp until it lathers, work the lather through with your fingertips, then rinse for about twice as long as you think you need. That is how to use a shampoo bar, and most of a successful switch lives in that last step.
We have handed bars to enough first-timers to notice a pattern. Almost every "shampoo bars just don't work on my hair" story turns out to be a technique problem or a water problem — not a hair-type problem. And the failures cluster hard in the first two weeks, which is exactly when people quit and go back to the bottle.
So this is not a list of tips. It is the sequence: what to sort out before your first wash, how the wash itself actually goes, what week one feels like, and the four specific things that go wrong with a clear fix for each. The bar is usually the first swap anyone makes toward a low-waste bathroom, and it is also the one people abandon most. We would rather you get it right the first time.
How to Use a Shampoo Bar: The Short Version
If you read nothing else, read this.
- Soak your hair properly. Thirty seconds under the water, not five. A bar needs saturated hair to lather.
- Wet the bar and warm it. A few seconds under the stream, then rub it between your palms until it feels slick.
- Go straight to the scalp. Glide the bar over the top of your head, behind the ears, and along the nape — four or five passes. Do not scrub the bar down the length of your hair.
- Lather with your fingertips, not your nails. Massage the scalp for thirty to sixty seconds. The lather will build as you go.
- Rinse longer than feels necessary. Sixty to ninety seconds, working your fingers through the roots. Under-rinsing is the single most common cause of the greasy, waxy result people blame on the bar.
- Condition the ends only. Mid-lengths and ends, never the scalp.
That is the whole method. The rest of this article is why each step matters and what to do when it still goes sideways.
Before You Start: Your Water and Your Bar
Two variables decide most outcomes, and both are settled before you ever step in the shower.
The first is your water. According to the U.S. Geological Survey, in hard water "soap reacts with the calcium (which is relatively high in hard water) to form 'soap scum'." That is the same reaction that films up your shower door, and it is the mechanism behind most shampoo bar complaints. The USGS classifies water as soft below 60 mg/L of calcium carbonate, moderately hard from 61 to 120, hard from 121 to 180, and very hard above 180, and notes that hard water is prevalent across the east-central and western United States. Your municipal water supplier publishes an annual quality report with your number in it; a five-dollar test strip works too.
The second is what kind of bar you bought, because "shampoo bar" covers two different products. A traditional soap-based bar is saponified — oils reacted with lye — and finishes on the alkaline side, generally cited in the pH 9 to 10 range. A syndet bar (short for synthetic detergent) uses the same family of mild surfactants found in liquid shampoo and is usually pH-adjusted much lower, though few bars publish an actual number — and published figures for shampoo vary widely, with a 2014 International Journal of Trichology survey of 123 shampoos finding a range of pH 3.5 to 9.0. Bar makers describe the same mechanism in their own guidance: The Earthling Co. says saponified oils "like to bind to the minerals in hard water, potentially leaving a waxy residue behind called soap scum," while Viori says its synthetic-surfactant bars are "pH-balanced and engineered to resist the worst effects of hard water."
This is why we keep saying to pick the right bar for your hair before you blame the format. If you are in a hard-water region, a syndet bar is not a preference, it is the difference between a swap that sticks and one that ends in the bin. Our roundup of the best shampoo bars we tested sorts them by hair type and notes which ones survived our hardest-water testing.
The Wash, Step by Step
The mechanics are genuinely different from a bottle, and nobody tells you that.
Saturate first. Liquid shampoo is pre-diluted. A bar is not, so it needs water in your hair to do the diluting. Hair that is merely damp gives you a stingy, patchy lather, and the natural response — rubbing harder with the bar — deposits far more product than you need.
Rub the bar on your scalp, not the bar on your hair. This is the step most people get backwards. Shampoo is for the scalp; the ends get cleaned by the runoff. Dragging a bar down the length of long hair is how you get a waxy patch at the ends and a scalp that still feels dirty. If you have hair past your shoulders, or you find the direct-to-scalp method messy, lather the bar between your hands and apply the foam instead. It uses a little more product but gives you more control.
Massage, then check for slip. Thirty to sixty seconds of fingertip massage. When the lather starts to feel slippery rather than squeaky, you are done.
Rinse like you mean it. We will keep saying this because it is the fix for most complaints. Run your fingers through the roots under the water until your hair squeaks slightly and no lather comes off in your hand. A minute is normal. Two washes on day one is also reasonable if you are coming off dry shampoo or heavy styling product.
Then condition the ends. Whether you use a bottle or a bar, keep it off the scalp. Conditioner near the roots is the other reliable route to flat, greasy-looking hair that gets blamed on the shampoo.
What the First Two Weeks Actually Feel Like
Here is where we have to be careful, because this is the most over-claimed part of the whole category.
Your hair does not detox. There is no mechanism by which hair expels toxins. What people call "detox" is buildup, and the medically reviewed description is plain: Healthline's scalp-buildup explainer, reviewed by Owen Kramer, MD, splits it into natural buildup — dead skin cells, sebum and sweat — and product buildup, the residue left by shampoos, conditioners and styling products. On top of that sit the calcium and magnesium hard water leaves on the hair shaft — exactly what chelating clarifiers are formulated to bind and rinse away. It is a deposit on the outside of the strand, not something coming out of it.
The "transition period" is real as a description of how hair can feel, but the numbers attached to it are marketing, not science, and the makers themselves do not agree. Ethique tells customers the adjustment typically lasts only a few washes. Other bar makers publish guidance in the two-to-four-week range, stretching to four-to-six weeks for heavy product users and up to eight weeks in hard-water households. At least one small maker, Silver Stone Apothecary, argues publicly that the transition period is a myth and that a well-formulated bar should not require one at all. Take any specific number of weeks as a vendor's estimate rather than an established fact.
What we can tell you from testing is what the first fortnight tends to look like in practice. Days one to three usually feel fine — often better than expected. Days four to ten are where hair can feel heavier at the roots or slightly coated, especially if you are coming off silicone-heavy products or washing in hard water. If you are still coated after two full weeks of correct technique, that is not an adjustment period. That is a bar or water mismatch, and the next section is for you.
The Four Things That Go Wrong, and How to Fix Each
Almost every failed switch is one of these four.
1. Hair feels waxy, coated or greasy after rinsing. The likely culprits, in order: under-rinsing, too much product, or a soap-based bar meeting hard water. Fix them in that order. Double your rinse time first — it is free and it solves this more often than anything else. Then cut the number of passes with the bar. If both fail and your water is hard, switch to a syndet bar or add a chelating clarifier — one that lists EDTA, citric or phytic acid — every few weeks to bind the minerals and rinse them off. A standard inline shower filter is not the fix here: those target chlorine and sediment, not the calcium and magnesium, which needs a softener's ion-exchange resin.
A diluted apple cider vinegar rinse is the remedy most commonly recommended for this, and plenty of long-term bar users swear by it. The usual dilution is one to two tablespoons of ACV in a cup of water, poured over the hair after shampooing and rinsed out. The honest caveat: the evidence is thin. Medical News Today reports that there is very little published research on ACV for hair and no evidence behind the pH-balancing claim people repeat for it, though it also finds no evidence that a diluted external rinse is unsafe, beyond keeping it out of your eyes. If your hair is already damaged or chemically treated, or your scalp is irritated, ask your stylist or a dermatologist before adding an acid rinse to the routine. Treat it as a widely used household fix worth trying once a week, not a proven treatment.
2. The bar will not lather. Nine times out of ten the hair or the bar is not wet enough. Soak both. Very hard water also suppresses lather, which is another tell that the mineral content, not the bar, is the problem. Long or thick hair may simply need a second, shorter pass rather than more scrubbing on the first.
3. Ends feel dry, straw-like or frizzy. You are almost certainly running the bar down the lengths. Keep it on the scalp and condition mid-lengths to ends every wash. Soap-based bars are more likely to produce this on porous or color-treated hair, where a syndet formula is the better match.
4. The bar turns to mush. This one is purely logistics. A bar sitting in shower runoff will dissolve in a couple of weeks; the same bar on a draining dish, a slatted soap saver or a small tin outside the spray can last for months. Give it somewhere to dry between washes and you should get noticeably more life out of it.
When a Bar Is Genuinely the Wrong Call
We are not going to pretend this works for everyone.
If your water is very hard and you are not willing to add a step — a softener, a chelating clarifier, a weekly rinse — a bar will fight you indefinitely. That is a fair reason to stay with liquid, or to keep the bar for travel only.
Thick, coarse or high-porosity curly hair is the other honest exception. Getting enough product distributed through dense curls without over-manipulating them is real work, and many curly-hair routines depend on conditioner slip that a bar-plus-bar setup does not always deliver. Some people crack it; plenty do not, and there is no failure in that.
And some people simply dislike the faff. Wetting a bar, storing it dry, adjusting a rinse — it is more fiddly than a pump. If the swap makes your morning worse every day, it will not last, and a swap you abandon saves nothing.
Making the Switch Stick
Start with the boring parts. Buy the draining dish at the same time as the bar. Look up your water hardness before your first wash. Plan on rinsing twice as long as you did with liquid. Then give it two full weeks of correct technique before you judge it — and judge the bar, not the format, if it goes badly.
On the payoff: according to Ethique, "one shampoo bar is the equivalent of three 350 mL liquid shampoo bottles." That is the maker's own marketing figure, not an independent finding, so treat it as an order of magnitude rather than a law. The direction is the point. The shower is where a household's repeat plastic purchases concentrate — the bottle and the cartridge alike — which is why the bar and a safety razor tend to be the two swaps that remove the most packaging for the least ongoing effort.
Get the technique right and the bar stops being a project and goes back to being what it should be: a thing you pick up in the shower without thinking about it. That is the whole goal of a zero waste bathroom — not a shelf of virtuous objects, but a room where the low-waste option is simply the one your hand lands on.
How we score
What it’s made of.
Chemistry you’ll touch.
How long it lasts.
Where it goes after.
Each pick scores 0–5 on the four axes above, weighted into the composite verdict at the top. Scores are derived from what a product is verifiably made of and certified as — not how green its label looks.
About the author
Ruth Lopez
I'm Ruth Lopez and I'm a lover of nature and the environment. I'm very passionate about finding eco friendly products that don't damage the environment and also support companies that have the same philosophy.